How to Make Ubuntu Looks Like Windows 7
Creating a Windows 7-style Ubuntu
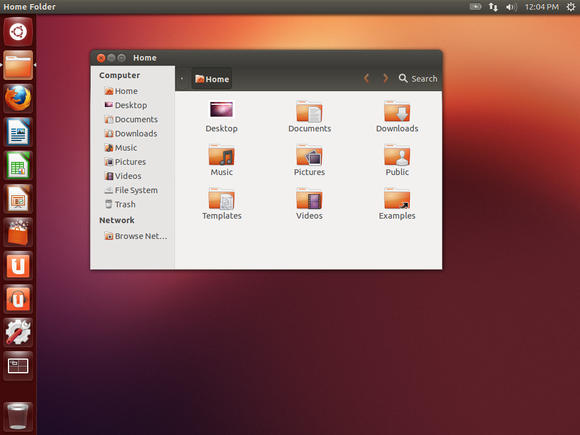
To be completely honest, Ubuntu's default Unity desktop may be slick and pretty, but it isn’t the most configurable Linux environment around. The taskbars running the top and left sides of its screen are locked in place and can’t be moved whatsoever. Unity is still fairly flexible, however, and some basic—for Linux—tweaks can give it some of that old Windows 7 charm.
A quick note: These tips were tested on Ubuntu 12.10, the most current version of the operating system at the time of publication.
We’re going to use some terminal commands throughout the course of this article. If you’re a new Linux user, don’t be scared—Linux’s powerful command line makes it easy to follow instructions you’ll find in articles like this one. Instead of following a list of long steps telling you to click here and click there, you can just copy and paste these commands into a terminal window and hit Enter.
To open a terminal, press the Windows key (known as the Super key in Linux), type Terminal, and press Enter. You can also click the Ubuntu logo at the top-left corner of your screen instead of pressing the Windows key.
First, we’re going to install a Windows 7 theme pack. Copy and paste
the following commands into the terminal window in order, pressing Enter
after each command to run it. The first command adds a personal package
archive (PPA) to your system that Ubuntu can install packages from. The
second command downloads information about the newly available
packages, and the third command installs the Windows 7 theme—no
installation wizard required. Typing sudo before each command allows it to run with root permissions, similar to running a program as administrator in Windows.
sudo add-apt-repository ppa:upubuntu-com/gtk3
sudo apt-get update
sudo apt-get install win2-7
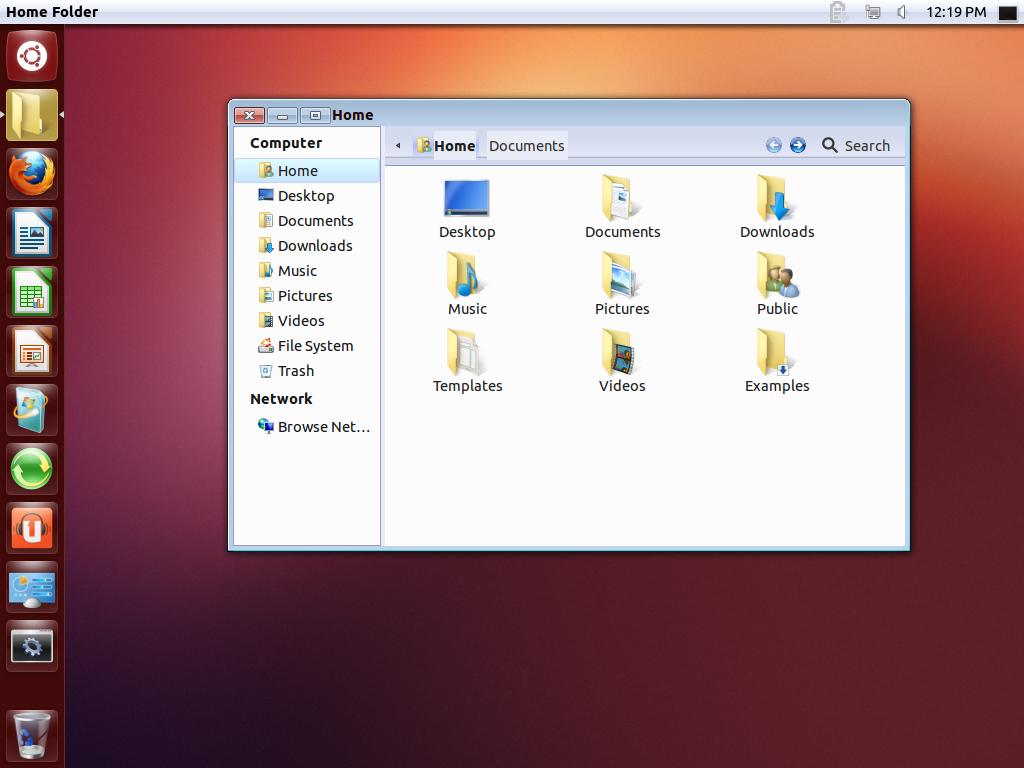
The Win2-7 theme is now installed. To enable the icon, window border, and widget theme, copy and paste the following commands into the terminal. As you run each command, you’ll see your desktop gradually transform and become more Windows-like.
gsettings set org.gnome.desktop.interface gtk-theme 'Win2-7-theme'
gsettings set org.gnome.desktop.wm.preferences theme 'Win2-7-theme'
gsettings set org.gnome.desktop.interface icon-theme 'Win2-7-icons'
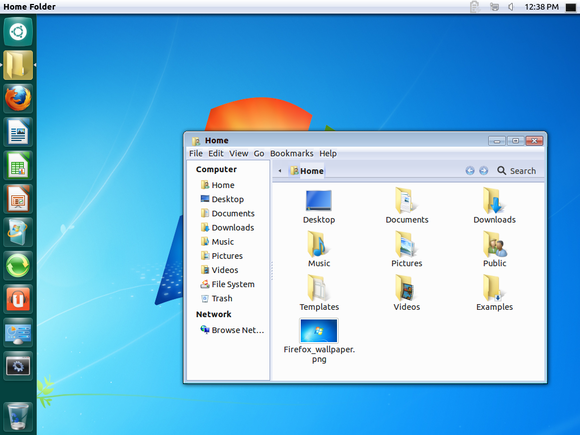
The taskbar-like launcher at the left side of your screen will still be a different color. Never fear—like Windows 7’s taskbar, the launcher derives its colors from your desktop wallpaper. For this article, we’ll use Windows 7’s default wallpaper, which you can find all over the Internet. (I snagged my copy from an old ZDNet post.) If you’re using Firefox on Ubuntu, right-click the full-size wallpaper image in your browser and select Set as Desktop Background.
You’ll also want to move the window management buttons—close, minimize, and maximize— located at the top-left corner of each window by default. Use this command to put them in a Windows-style order:
gsettings set org.gnome.desktop.wm.preferences button-layout 'menu:minimize,maximize,close'
To remove the Mac-style global menu bar and put the menu bar (containing File/Edit/View) back into each individual application window, run this command:
sudo apt-get autoremove appmenu-gtk appmenu-gtk3 appmenu-qt indicator-appmenu
You’ll have to log out and log back in for this change to take effect. Use the button at the top-right corner of your screen to log out.
Do you like what you see? This is as close to Windows 7 as we’re going to get with Ubuntu’s default Unity desktop environment. If it doesn't quite scratch your itch, keep reading to learn how to create a more traditional Windows 7-style look using the Xfce desktop environment.
Installing and customizing Xfce
For this method, we’ll be throwing Ubuntu’s default Unity desktop out and going our own way. (Okay, we’re not actually throwing it out, just selecting a different environment on the login screen). Xfce is one of the most popular desktops that still offers a lot of configurability. Install it with this command:
sudo apt-get install xubuntu-desktop
Log out of Ubuntu using the menu at the top-right corner of the screen and click the icon next to your name on the login screen. Select Xubuntu session and log in normally. (You can install multiple desktop environments and toggle between them on the login screen like this.)
Xfce also uses a two-panel layout by default. We’ll have to do some heavy customization to get it looking more like Windows 7, but it’s all graphical—if you’re a Windows power user, you’ve done this kind of tweaking many times before.
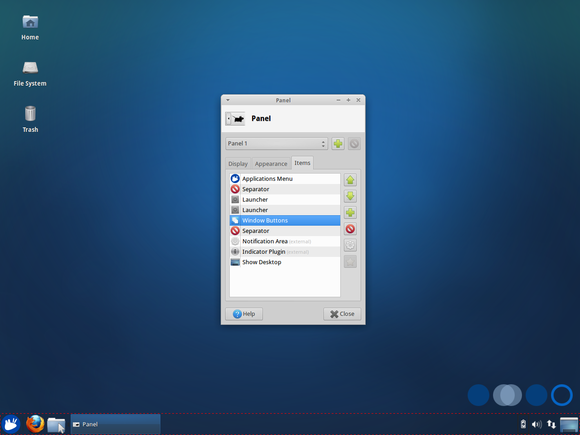
First, get rid of the top panel. Right-click it, point to Panel, select Panel Preferences, and click the red Remove button. Use the drop-down box in the panel configuration window to select the other panel. Uncheck the 'Automatically show and hide the panel' option and check the 'Automatically increase the length' option. Now we’re getting somewhere! At this point, you should have a single taskbar-like panel across that bottom of your screen.
Use the buttons on the Items panel to remove the items you don’t want, add the items you do want, and reorder them as you see fit. For a Windows 7-style taskbar, try using these items in the following order:
Applications Menu, Separator, Launcher, Window Buttons, Separator, Notification Area, Indicator Plugin, Show Desktop.
Add as many launchers (read: shortcuts) as you like to the launcher section and think of them as your new quick launch bar. Unfortunately, Xfce can’t group applications and open windows the same way Windows 7’s taskbar can, so it’s a bit more old school.
To configure an item, select it in the list and click the Gear button. You’ll also want to disable the 'Show button title' option in the Applications Menu item’s settings.
Theming Xfce to look like Windows
Now we just have to make Xfce look more like Windows 7. If you didn’t run any of the commands in the Unity section above, run the commands below in a terminal. (Right-click the desktop and select 'Open terminal here' to open a terminal in Xfce.)
sudo add-apt-repository ppa:upubuntu-com/gtk3
sudo apt-get update
sudo apt-get install win2-7
gsettings set org.gnome.desktop.wm.preferences theme 'Win2-7-theme'
gsettings set org.gnome.desktop.wm.preferences button-layout 'menu:minimize,maximize,close'
Open the Settings Manager from the applications menu and click the Appearance icon. Select Win2-7-theme in the Style list and select Win2-7 in the Icons list.
Press Alt+F2 and run the following command to get Windows 7-style window borders. If you're typing this out rather than copying and pasting, note that the command includes a double-dash, not a long em dash.
metacity --replace
Go into the Session and Startup panel in the Settings Manager, select the Application Autostarttab, and click the Add button. Enter Metacity as the application’s name and metacity --replace as its command. Now Windows 7-style window borders will automatically start with your desktop.
To make your panel look more like Windows 7’s panel, right-click it, point to Panel, and select Panel Preferences. On the Appearance tab, select Background image and browse to the \usr\share\themes\Win2-7-theme\gtk-2.0\Panel\ directory on your computer. Select a background image like Panel_Win2-7Basic800.png. The theme pack we installed includes a variety of panel backgrounds, so feel free to experiment.
You can also change the applications menu’s graphic and make it use a Windows 7-style start orb. First, find a Windows 7 start orb image—you can find several on Google Images, but make sure you get a transparent PNG image. Once you’ve found a good image, right-click the Applications menu button, select Properties, and use the Icon button to select your start orb.
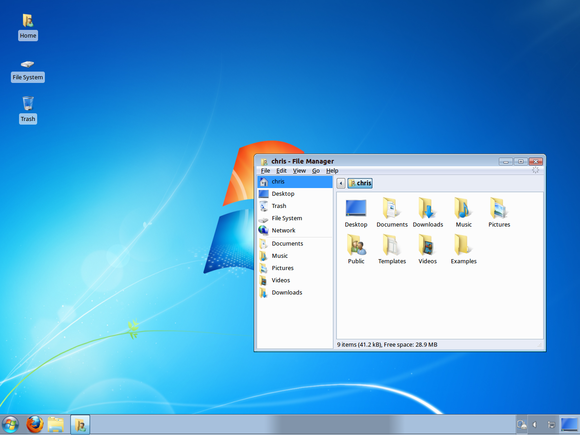
Phew, that took a lot of tweaking (and a lot of text)—but we now have a Windows 7-style desktop on Ubuntu. It lacks a Windows 7-style Start menu and taskbar, but Windows users that prefer the classic Start menu and taskbar behavior will find it immediately familiar.
Undoing your changes
Want to undo your changes? If you followed the first method, just run these commands. Remember to log out and log back in after running the commands to restore the global menu bar.
gsettings reset org.gnome.desktop.interface gtk-theme
gsettings reset org.gnome.desktop.wm.preferences theme
gsettings reset org.gnome.desktop.interface icon-theme
gsettings reset org.gnome.desktop.wm.preferences button-layout
gsettings reset org.gnome.desktop.background picture-uri
sudo apt-get install appmenu-gtk appmenu-gtk3 appmenu-qt indicator-appmenu
If you followed the second method, log out and select Ubuntu’s default desktop environment from the login screen. You can toggle between the two whenever you like. If you’d like to uninstall Xfce, use this command:
sudo apt-get autoremove xubuntu-desktop
These processes are a good demonstration of just how configurable Linux is. You can rip out software from the default desktop, use all sorts of themes, install a completely different desktop environment, or even build your own desktop environment by cobbling together pieces from different desktop environments—that’s what we did in the last section.
More Articles