3 Ways TO Build a Playhouse
2017.09.30
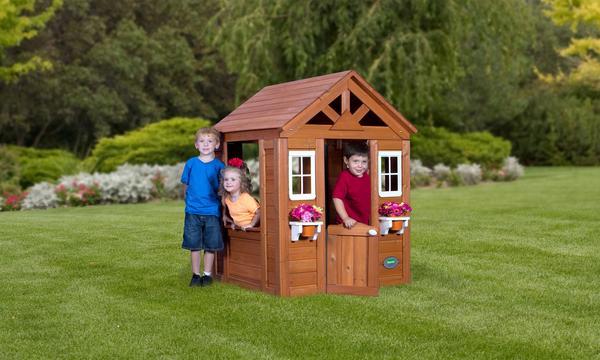
Playhouses are a wonderful way for children to use imagination to explore the world around them. There are lots of ways for them to do this - toy houses for boys and girls are one way, but playhouses are another great option.
There are multiple designs and plans parents can utilize to create wonderful playhouses for their children. This can be a great activity for the whole family to get in on, and doesn't have to be expensive for the parents to prepare for. Here are a few of the ways you can make a creative and fun playhouse which will provide your kids with hours of enjoyment.

1) Cardboard Playhouse :
- To create a cardboard playhouse, obtain several large boxes. Large appliance boxes are best fitted to this project, but any large boxes will work.
- Take your largest box, and cut off all flaps. Tape all remaining seams to make sure the "house" will keep its shape.
- Cut two triangles whose hypotenuse is the same length as the narrow side of the frame. Then cut two rectangles the same length as the walls. Tape these four shapes together to create the roof of the house, then tape this structure to the walls.
- Use a box cutter to make two cuts in the wall to create a door that opens and closes. Also, you can cut out windows.
- The decorations are up to you! You can arrange rows of cardboard "petals" on the top of the roof to create shingles, add wrapping paper or other decorations to the walls, or even leave this part up to the kids and let them use markers or crayons to personalize the "fort."
2) PVC Playhouse :
- Gather your materials. In order to create a reasonably sized playhouse, you will need a PVC pipe cutter and seven 3/4 inch wide PVC pipes each ten feet long. Also, you will want multiple 3/4 inch converter pieces, including four T pieces, four 45 degree angle elbows, and ten three way connectors. Finally, you will need two old sheets, some ribbon, and access to a sewing machine.
- To create the frame for the playhouse, you must first cut four of the PVC pipes into four six-foot lengths and four four-foot lengths. These will be arranged into two rectangles, which you will use three-way connectors to secure together. On one of the rectangles, place a T-shaped connector on each corner, facing upwards. This rectangle will be the top. Next, you will connect the two rectangles using four lengths of PVC. The length of these pieces is up to you - just make sure all four are identical! The resulting shape will be a rectangular prism, with the upward-facing T-connectors on top. Finally, to create the roof, you will need to cut four pieces of PVC pipe the same length as the sides of the "building." Create two right angles with these pieces by connecting them with three-way connectors. Use a six-foot length of PVC as the connection between these angles, then attach this structure to the base with the T-connectors previously described. Make sure your connections are secure. You've finished your frame!
- To create the "tent" to cover the frame, you will first need to create your pieces. Measure all of the sides, as well as the roof, add an inch to the measurements, and cut the pieces accordingly. Use your sewing machine to sew the pieces together to match the shape of the frame. Attach six-inch lengths of ribbon at the midpoint of each seam to allow for tying the tent to the frame on the inside. To create a door, cut a flap in one of the walls of the tent - you can either cut two parallel vertical lines for a roll-up door, or an inverted "L" shape for a door which opens horizontally. If you choose, you can also cut out windows. Once this is completed, the rest of the design is up to you! Feel free to get creative - use fabric paints to add flower boxes, felt patches to create shingles, etc. You and your children can let your imaginations run wild!
3) Over-table Playhouse :
- First, make sure you have a table you can use.
- Secondly, get enough cloth to cover the top and sides of the table. You can use old bed sheets, or buy fabric at a local fabric store.
- Measure the dimensions of the table and use those numbers to create the sides and top of your tent. Make sure to add an additional inch to the measurements to make sure the tent fits easily over the frame of the table. Sew the sides together.
- Cut out the door by making either a horizontal or vertical flap in the side. If you like, you can also cut out windows.
- Get creative! What you do to decorate is up to you. Sew on patches, create shutters, whatever "floats your boat" - have fun with it!
These are just a few of the unique ways you can create an awesome fort for your kids to play in. The basic instructions are provided above, but let yourselves and your kids have a little fun with the rest of it. Playhouses are a great way for kids to exercise their imaginations and play. Enjoy creating these forts with them, and they're sure to get hours of fun out of them!
More Articles
Copyright © Fooyoh.com All rights reserved.